Thursday, March 20, 2014

Webinar - Supply Links

Stencils I Used:
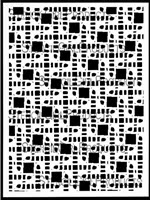
http://www.stencilgirlproducts.com/Crosswords-Stencil-p/l206.htm
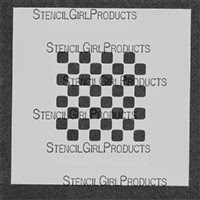
http://www.stencilgirlproducts.com/product-p/m014.htm
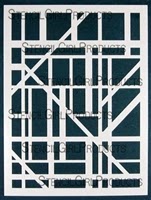
http://www.stencilgirlproducts.com/product-p/l046.htm

Supplies that I used in Demos and/or discussed


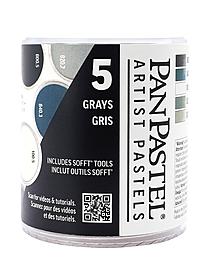
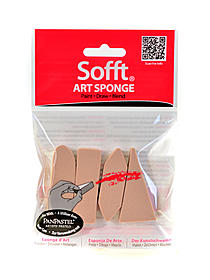
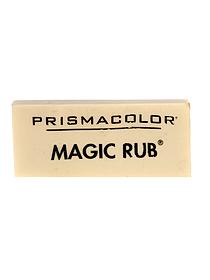
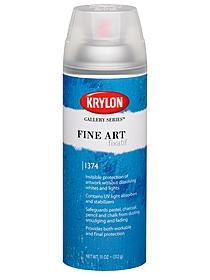
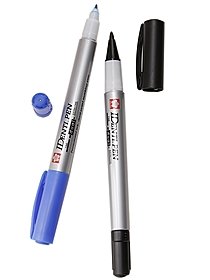
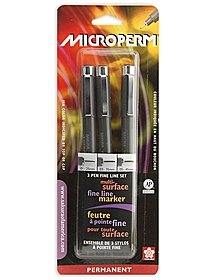
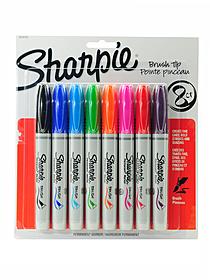
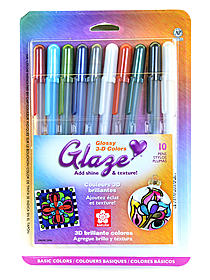
Pan Pastel Starter Sets painting Colorfin Art Sponges mixed bar pack of 4 Magic Rub Eraser block each Fine Art Fixatif 11 oz. can Identipen Marker black Microperm Fine-Line Pen Set set of 3 Brush Tip Permanent Marker Sets assorted set of 12 Gelly Roll Glaze Pens black pack of 2
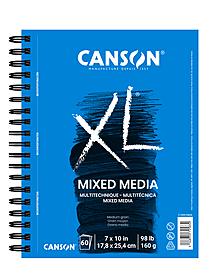
XL Mix Media Pads 9 in. x 12 in. pad of 60 sheets wire boundInk Applicators Ink Sweeper each

Pitt Big Brush Artist Pens dark chrome yellow 109

Pitt Big Brush Artist Pens orange glaze 113
Catalyst Silicone Tools mini blades no. 2 white
Catalyst Silicone Tools wedge No. 6 white

(please note I will continue to update this list with links of where you can buy some additional products that are not listed)


Monday, February 24, 2014

StencilGirl and Walnut Hollow Blog Hop

I love me some wood burning.
It is hard to find a savory art, one that smells good, like a crackling fire on a cold night. Needless to say, I was delighted when Walnut Hollow agreed to do a Blog Hop with StencilGirl. And when I met Chris and Sara at CHA I was even more delighted; they are just the kind of people I like to hang out with, so down to earth and easy to like. 
I have two tools from Walnut Hollow. In the interest of disclosure, both were gifts Walnut Hollow sent to me - the Hot Marks and the Creative Versa-Tool. I really like both of them. 
See that knife? That is the attachment I used to cut the foam core. 
The Hot Marks tool has a variety of attachments and may be used on nearly all surfaces including paper, wood and......wait for it.....foam! You know how I am about foam, I do all my doodling on Foam core and struggle with cutting it, I mean struggle, that being with a capitol STRUGGLE.
Well no more of that! '
This Hot Marks tool makes an easy job of slicing Foam core, it is like buttah, I kid you not. Where have you been all my life, Hot Marks?
Instead of boring you with pictures of me cutting up blocks of Foam core, I decided to play around a little bit by attempting to cut something more complex. 
Here is a confession. 
Although I LOVE our stencils, I also like that play on positive and negative that occurs when you have a stencil and a matching stamp. But alas, we are not a stamp company. So what to do??? Hmmm, Foam stamps anyone?
I selected the stencil Wonky Eyes, one of my new faves. First I stamped the design of the stencil onto the foam and then I started to cut. I am telling you - buttah! It is awesome. SO quick and easy that I kind of surprised myself. 

After cutting, I glued it onto another piece of foam using Gel Medium. I put a coat of Gel Medium over the top too so it would be sealed.

Wow, wow, wow!! I love the effect. See that more solid blue-ish piece in the back? That is what the actual stencil looks like. And now I have a stamp too. Gotta love it!!!
The Creative Versa-Tool is very snazzy! In addition to all the attachments, this tool has a temperature adjustment. It gets really hot and you can do master wood burning with it. Or I guess you could if you were a master wood burner. I am a baby wood burner. 
First you need wood (duh) and Walnut Hollow has got you covered. They have these sweet wood panels in a variety of sizes. The front size is smooth and perfect, the back side as a little cradle so you can pop that puppy right onto the wall once you are finished!  

I selected the small Tribal Hand stencil because I thought it might look like a Henna effect after it was burned. The first step is to sand the wood so it is very smooth. I will just admit from the start that I forgot this part because I was so excited about the burning part and it still worked. But I had really smooth wood to start with. After sanding, lay out the stencil and trace the design using a pencil. 
I
Once you have traced, you are pretty much good to go. When you look at the kit, you will see a bunch of different attachments and I can only tell you which ones I liked, you would really need to play around on your own. 

For the linear parts, and the outline, I liked the small chisel shaped too, I think it is really for calligraphy but it worked well for my purposes. I also used the Universal tip. When I was doing the curvy parts, I used the shading tool and there is a terrific tool for making circles, hence my edge treatment. I can't tell you how satisfying it is to hear the sizzle of the burning wood as you raise and lower the tool to make each circle.
And voila, here is the final product. 
To recap, I learned some things using both these tools that I want to share them with you. 
1. Read the instructions before you start. Seriously. There are useful tips as to how to work with different surfaces. 
2. If you are changing attachments, turn the tool off and allow it to cool down first. Make sure you really have it turned off(uh, just saying.....) and use pliers to handle to screw the attachments in and out. 
3. Let the tool do the work, you do not have to force anything with either of these tools, they have ample power and heat for any of the tasks indicated, you don't need to use force of any kind.
4. If you mess us, you can use a knife (or sandpaper) to scrape the burned part away, then you can re-burn.
5. Have fun! You can do lots of cool stuff.

Blog Hop Order
Mary Beth Shaw You are HERE
Kirsten Reed Go HERE next


Monday, February 17, 2014

Do you have Attitude?

I have Attitude, do you?
Craft Attitude, that is!
I have been curious about this product for over a year (!) and just recently had a chance to try it out. In case you are wondering exactly what Craft Attitude is.......well, it is a paper that has a fancy schmancy coating on it so you can run it through your ink jet printer. And then, it will bond to any surface - and I do mean B-O-N-D, as in molecularly, it is not a transfer or a sticker, it really becomes part of the surface.
There are tons of super cool applications for three dimensional products and I do think I want to try that some day, imagine one of my abstract paintings on a box or a purse or belt or ? 
But this time, I simply worked in my journal, to see how it would perform flat.
First thing I did was select several photos that I wanted in my journal. I laid them out in Photoshop so they would print on one page of Craft Attitude.
See that telephone pole picture and the electrical wires? That is one I had selected and I cut it out and put it in position on my page. I used a couple stencils, Segments, by Michelle Ward and Net , which is one of mine. The picture below shows how I removed the image and then layered the stencils before applying the paint.
I worked a bit more on other parts of the page and used two other photos I had also printed on the Craft Attitude. After I was satisfied with the look I created, I used a Glue Stick to adhere the images to my pages. And wow, it was done. 
How easy is that! I love that transparent look, where you can see the photos but also see the painted parts underneath. It is really nice to be able to move these journal pieces around and 'audition' them for different parts of the page. I also love how the Craft Attitude blends so seamlessly with the page.
This is a final picture of the 2 page spread, 3 pictures total, the b+w in the lower left, the xoxo and the pole. I definitely see myself using the Craft Attitude again. Specifically, I want to print out images of some of my other journal pages and art pieces so I can re-purpose them in my art. 
Cool stuff indeed.
Check out the Craft Attitude Facebook page HERE to see lots of other ideas.

Monday, January 27, 2014

StencilGirl NEW Release Blog Hop Featuring Michelle Ward

Michelle Ward was one of StencilGirl's very first designing artists. I was thrilled when she made the decision to join us and remain delighted every time she submits new work, this latest batch being no exception. In fact, I happen to L-O-V-E this group of stencils and know I will use them over and over. I almost feel like Michelle crawled into my head with these designs, ha, but that would be a very scary place, my head.
Without further ado, here is the stencil I used:

I knew I wanted to use this stencil to work in my journal, that being the journal I made when I co-taught with Michelle, Pam Carriker and Andrew Borloz last November at The InkPad in NYC. It was such a cool teaching event, the energy of all four teachers seemed a teeny bit magical to me. It was the first time I had ever met Michelle in person and we hit it off so well I ended the weekend feeling sad that we didn't live closer to one another so we could connect more often. The journal I made during our class has become very special to me as a representation of that terrific weekend.
When I made the journal, it was constructed of a variety pack of painted papers and bringing them together color-wise can be a challenge. I have to really work the pages to find cohesion. When I first saw this stencil, I knew I wanted to create some 'parts' using Michelle's stencil, parts that I could keep in my stash to use when journaling.
So first, I got a piece of random painted paper and determined the parts of the stencil I wanted to use. I sketched lightly around the edge and cut them out as shown below.
Next, I decided to paint more papers. I am using a piece of plain ole text weight paper and I started out quite light then darkened the color as I moved on.

Using another of Michelle's stencils,


I added more layers at the opposing corners.


And then I went wild......moved the stencils over and over, changing the orientation of the paper as I went. More color, light, dark, repeat. Until I ended up with this, kind of busy, eh? But I could see that I had LOTS of good parts.

I got a circle guide and selected a couple areas of the paper that I wanted to use in my journal. The circles I cut are shown below. And see the linear part on top of each one? Another Michelle stencil; I used a Baby Wipe to remove paint from the circle, not going all the way down to the white, but kind of halfway. 
So what next, you might ask? Here are a couple spreads in my journal and I think you can easily get an idea how these circles will fit right in! Plus I also have a cool sheet of painted paper to use another time.

Be sure and hop all around and see what our Team has done, their talent amazes me every time we hop. Also, don't forget to leave comments. StencilGirl Products, LLC is giving away one entire set of Michelle's NEW stencils and you will be entered in the drawing every time you leave a comment. 
And trust me, you are going to want these stencils, they are so incredibly versatile!

Monday, January 06, 2014

Sketch Collage

I am over at The Sketchbook Challenge today talking about this month's theme - Sketch Collage. Check it out HERE.

Friday, January 03, 2014

StencilGirl Blog Hop Featuring Kae Pea

Hop, Hop, Hop.......what happens when you start out using stamps and then get distracted, when you use stencils and it doesn't even look like it? Welcome to my world......geez.....

I had every intention of using stamps. In fact, I started out my piece using several of Kae Pea's stamps.....this one
Nancy Curry words and phrases
But alas, in a stupidly distracted studio moment I forgot to photograph the piece because I have encaustic of the brain and slap wax over everything I touch these days. If anyone can understand being distracted I know without a doubt it is Kristen, aka Kae Pea, as she and I share this ailment, good grief.......so anyway, I apologize and hope you will pick up with me here, a few layers later, when I finally grabbed my camera.

Several layers of over-fused encaustic wax on top of rubber stamped wood substrate.
I used Kristen's stencil Simple Geo Circles which I LOVE using to create circles. This photo shows them before fusing.
Here, I have placed the stencil on top of the piece and put a larger circle pattern over the one I previously created. I then used it as a guide to add some encaustic paint around the edge.
Overfusing the paint blurs the edges and all evidence of a stencil is removed.


Final piece. The linear work was done with Golden High Flow Acrylic. 
Close up.

Saturday, December 21, 2013

The Curmudgeon


Confession time. 
I am a Christmas Curmudgeon this year. 
I think part of it stems from the fact that I have been crazy busy, and this is my first chance at 'down' time, whatever that might be. I have an idea I would like it - down time - ya know? The pace of life has become a tad unmanageable or is it just me? Is everyone spinning along with me?

So the Curmudgeon thing, what's up with that....
I haven't decorated.
Now this (the lack of decoration) relates to the fact we were having work done on the house. It is hard to get whipped up about Christmas decorations when you have cases of wood planks covering the living room floor, when power tools are strewn throughout the dining room, when stencils supplies have over run other parts of the house and when all members of the household have tiny pieces of Mylar stuck to their shoes and fur. My husband is like the Pigpen character except instead of a cloud of dust, he is surrounded by a cloud of scrap Mylar.
Seriously.
I am working on the house, room by room, compelled to get this done; ok, I am obsessive. 
Must.Restore.Nest.
My office is finished - here are some snippets......
it is organized for the most part. There is expansion room, for books naturally, hahaha. I now know where my things are. It feels girly and pretty and soothing and calm. I absolutely love how it turned out. All that I am lacking is the slip cover for my easy chair (not shown here due to ugly factor), necessary because my cherished kitties have ripped the crap out of the upholstery, an unsavory byproduct of cats with claws that sometimes occurs in spite of all our best efforts with cat scratching toys, towers, etc. Ugh, those little critters (Jasper, I know it was you), good thing I love them so much. And lucky for me, I actually like the look of slipcovers.
The Curmudgeon hasn't made Cookies.
I always make cookies. Perhaps I will kick into gear next week? Grandma's Thumbprints are whispering to me.
The Curmudgeon has however bought gifts. 
Yes, I have managed to get that done, thank goodness for the Internet. As much as I prefer to support local stores, I simply didn't have time for 'the hunt.' It was easier and quicker to do a quick search and the ole One Click.
How are all of you doing this Christmas?
Any other Curmudgeons out there?
In other news, I have updated my Workshop page......if you wonder where I am going to be in 2014, check it out.