Wednesday, April 19, 2017

StencilGirl and Amazing Casting Products


When I was attending Creativation (fka CHA) this year, I met up with my friend Cat Kerr at the Alumilite (Amazing Casting Products) booth. I was floored by the complexity of products she was making, from assemblage to embellishments for artwork to jewelry. She rocked my world with her artistry of the mysterious(at least to me) art of making molds and casting resin pieces. The idea of a Blog Hop was born.

In case you don't understand how a Blog Hop work, this is what happened. The lovely people at Alumilite sent my StencilGirl peeps some product and us, here at StencilGirl, sent their peeps some stencils.
Playtime ensued. At my house, this always includes a cat. Ahem.

But I digress, let me show you what I received. Keep in mind I had absolutely zero ideas what to do with these products.
Seriously. I learned by reading the box. First you mix up the putty and make a mold. Then you pour resin into the mold to make your object. It is really quite simple, I am sure a chemist could explain why this works, hahaha.
Naturally, I was interested to know if I could use stencils to make 3-dimensional objects. And voila! Yes, it can be done. The first picture below shows a Seth Apter stencil and the second shows a Rae Missigman feather mask. When you use a stencil or a mask, the result will be flat. In order to transform this into a mold (that will hold resin), you need to make a little wall about your imprint. The second picture shows the 'wall' which was made by rolling the putty into a little snake and then attaching it - it basically attached itself on contact, so this is super easy.
But I couldn't stop at stencils because I also wanted to make a mold of something else, something fun! I searched and searched for something cute, buttons, acorns, shells, hmmmmm, such potential. I settled on a tiny tube of paint that met my requirements and oooh la, who knew how much I would love making wee resin paint tubes.

Here is an images of my final products prior to painting and after painting.

Not sure what I am going to do with them as of yet. I am amazed they are quite strong and I am thinking a closure on the front of a journal for one of the feathers, wouldn't that be cool! 

After playing for several days, here are my tips:
  • Don’t be stingy with the product. I had a couple molds that were too thin just because I was trying to ‘save’ product. You will get much better results with a beefy mold that will stand up to multiple uses.
  • If you are using a stencil or a mask, pick an isolated image rather than one where the image is part of an intricate pattern. 
  • When using a stencil, first, use a brayer over the stencil (on the mold putty) and then use a thin palette knife to press the stencil even deeper.
  • After making your resin piece, you are easily able to trim off ugly edges. I found you could also trim the resin the next day too. I imagine you could also poke holes in it (to make jewelry).
  • To add color, I put the Alumidust in the mold prior to pouring the resin. Gorgeous! 
  • I forgot to do this a couple of times and my resin piece dried to solid white. No worries though because I was able to add color with Pitt pens, Acrylic paint (craft and Golden), Sharpie marker and Stayzon ink. Seems like nearly anything might work. 
All in all, I had a terrific time and know that there is more mold making in my future. Can you say paint tube earrings?????

Here is a list of the participants in our Hop and the dates you may read their posts:
April 19
Mary Beth Shaw (you are here)

And YES!!! There is a give away, of course there is!

GIVEAWAY
One lucky winner will receive both a $25 Gift Certificate to StencilGirl Products
AND a $25 Gift Certificate to Amazing Casting Products!
Visit the fabulous designers from both teams and comment for your
chance to win!
The more blogs you comment on, the more chances you have to WIN!
(One comment per blog please.)
You have until Sunday, April 23rd at 11:59PM Central Time to leave your comments.
Winner will be announced on
StencilGirl's Facebook page and Amazing Casting Products’s Facebookpage
on Monday, April 24th.

Monday, April 10, 2017

Abstracts in acrylic & ink by Jodi Ohl

Have you seen my friend Jodi Ohl's book? Here's a picture of the cover, so beautiful; I am in the book, on page 138 to be precise; it was so sweet of Jodi to include me!
Abstracts in Acrylic & Ink by Jodi Ohl
If you are interested in painting abstracts, there is a lot to love about this book. As you all know, I've painted my fair share of abstracts and am quite impressed with Jodi's great way of organizing information in an accessible manner. She includes a ton of fun techniques with different substrates (Yupo! Claybord!) and ways to create texture (alcohol! Crackle medium!). If you aren't inspired by all the goodness in this book, well, your heart must simply be dead to abstracts. 
LOL
Seriously though.....
Stencils and scribbles and doodles and painted papers, you know how much I love all these things, I feel like Jodi crawled into my head and put together a book talking about all my favorite stuff.
Bottom line: if you want to explore Mixed Media abstract painting, this is the book for you!
And, guess what.....I just happen to have a copy to give away.
Leave me a comment below as to why you are playful enough to paint abstracts! 
Because painting abstracts takes a leap of faith and playfulness is definitely encouraged.
I will select a winner on April 17th. 
Be sure and leave me your email in the comments. Email at blank dot com.

Wednesday, April 05, 2017

StencilGirl and Canvas Corp make Surfaces


This month StencilGirl Products is collaborating with Canvas Corp Brands to show you unique ways to use StencilGirl stencils with a variety of Canvas Corp Brands surfaces and Tattered Angels Paint Kits! Be sure to check out the details at the end of this post on how you can win a wonderful prize package worth over $50 in goodies from StencilGirl Products and Canvas Corp Brands!

Canvas Corp is practically a neighbor of StencilGirl! I mean, shoot, they live right down the road from us in Arkansas (we are in Missouri). They manufacture under the names Canvas Home Basics, Tattered Angels and 7gypsies.
Back in the day, before I spent the bulk of my time running SGP, I used 7gypsies materials in my collage work All.The.Time. There are certain discontinued 7gypsies tissue papers with which I am obsessed and I may be hoarding them. Just sayin'
Imagine my delight when I was allowed to pick some products to try! I wanted to play with the Tattered Angels brand, specifically the Naturally Aged Kits - I chose Tarnished Silver.
This stuff is crazy! I mean seriously crazy. You can get such interesting effects and you can absolutely depend on it. I have tried this sort of thing in the past and could never get it to look right, but trust me when I say these are completely awesome.
I went a wee bit wild I shall say, on tags, scrap paper, in my journal. My oh my. 
The thing is, the package insert is excellent, so incredibly specific with a step by step description of how to get the desired effect. It would be impossible to mess it up and trust me, I am the Queen of messing stuff up. I did spill one of the bottles, but, I think I was overexcited. 


See what I mean? Addictive in a good way.
All these examples were done on paper type products, gessoed and non-gessoed. The last image shown (above) is a journal section where I had used a stencil from our StencilClub, my designs from January 2017.
Here is the Tag that I made and embellished with other products from Canvas Corp. I also used our stencil by Carolyn Dube, Now is the Time, one of my favorite stencils ever.
Just as an fyi, these Kits will work on matte or glossy paper; canvas; corrugate (must try this next!); handmade papers; cork; other natural materials. And I must say, I need to get my hands on some more of these as there are other Kits I am dying to try - the Peeled Paint Kit or the Age Terracotta or the.....well, you get the idea, they are all pretty special.


What would a matchup be without a fun prize!!!!
Here’s your chance to get your hands on a products from StencilGirl Products and Canvas Corp Brands.
All you need to do is….
  • leave a comment here on any or all of the Matchup Posts during the month of April with StencilGirl Products and CCB.
    You can leave one on each post for more chances to win. Don’t forget to include the hashtag #SGPCCBmatchup so we can find you!!!
  • and/or leave a comment on the CCB Facebook page or StencilGirl Products Facebook page. Don’t forget to include #SGPCCBmatchup so we can find you!!!
  • and/or leave a comment on any of the CCB Instagram posts or StencilGirl Products Instagram posts where you see any of the projects from the CCB team or the SGP team.
    Don’t forget to include #SGPCCBmatchup so we can find you!!!
  • You can follow along by searching #SGPCCBmatchup. If you love what you see and would like to join the Facebook group CCB Collective – ask to join today.
  • You can find all StencilGirl Products in our shop – www.stencilgirlproducts.com
  • Shop Canvas Corp Brands at https://shop.canvascorpbrands.com 
  • We will be sharing projects the entire month of April – learn new techniques, see how new products are used and be inspired with great ideas from members of the SGP and CCB creative teams.

Monday, November 28, 2016

I am once again participating as an artist in Creative JumpStart (CJS) 2017, run for the 6th time by Nathalie Kalbach. If you're not familiar with CJS, it's a one-of-a-kind online event to kick your creativity into high gear in January 2017. I sooooo look forward to this every year. The videos are really substantive; the artists pack a lot into a short time frame and they are just enough to get me jazzed without causing me boredom.....ahem, I will admit it, I sometimes fast forward through videos if I am not interested. I never find that to be the case with CJS!!
And I have to say, the artists this year totally rock! 
I can.not.wait. Anxious to sign up? Click here already :)
Throughout January you will get access to 27 downloadable videos from 27 featured artists. I'm proud to be one of those artists, called “JumpStarters.” And StencilGirl is proud to be a sponsor. See for yourself:

Announcing Creative JumpStart 2017 - CJS17 from Nathalie Kalbach on Vimeo.

You will really want to do this, trust me, it's a terrific bargain. 

Thursday, October 20, 2016

Art Journal Your Archetypes Give Away

11/03/16 UPDATE 
Contest is over now and Jean Marmo is the winner!! Congrats, Jean!
I am thrilled to announce that I am a participating artist in Gabrielle Javier-Cerulli's new book, Art Journal Your Archetypes. When I heard about the book, I immediately knew I wanted 'in' because I have studied archetypes ever since I lived in California (late 90's). Gabrielle outlines Carl Jung's definition of an archetype as,
"an inherited pattern of thought or symbolic imagery derived from the past collective experience and present in the individual unconscious."  
Although this might sound like some woo woo verbiage, the study of archetypes is a way of exploring your personality and learning more about yourself based on patterns of behavior. It is fascinating, I mean who doesn't want to understand themselves better, right? To work on these ideas in conjunction with an Art Journal, well, that just makes a lot of sense!
I was lucky enough, as a participating artist, to have a consultation directly with Gabrielle. We walked through the testing and analysis together (there is a self test in the book!!) and I discovered many interesting things about myself. It was a moving experience that I would recommend to anyone, an appointment with Gabrielle. 
I also did a number of journal spreads that are within the book along with an explanation of archetypes that apply to me and the other featured artists - Seth Apter, Orly Avineri, Jessica Sporn, Nathalie Kalbach (lots of StencilGirl artists!!) and others. It is rather engrossing to read about each person. Uh yeah, I'm apparently a little bit voyeuristic, ha!!
If you are interested in watching the video conversation between myself and Gabrielle, you can find it on Youtube. You will be surprised at what I reveal about myself. 
But now for the good news........
I am giving away a FREE copy of this book to one of my lucky Blog Readers. All you need to do is leave me a comment below about why you would like to win this book. I will draw a name on Halloween!! Please make sure you leave your email address so I have a way to contact you. 

Monday, September 26, 2016

StencilGirl and Impression Obsession


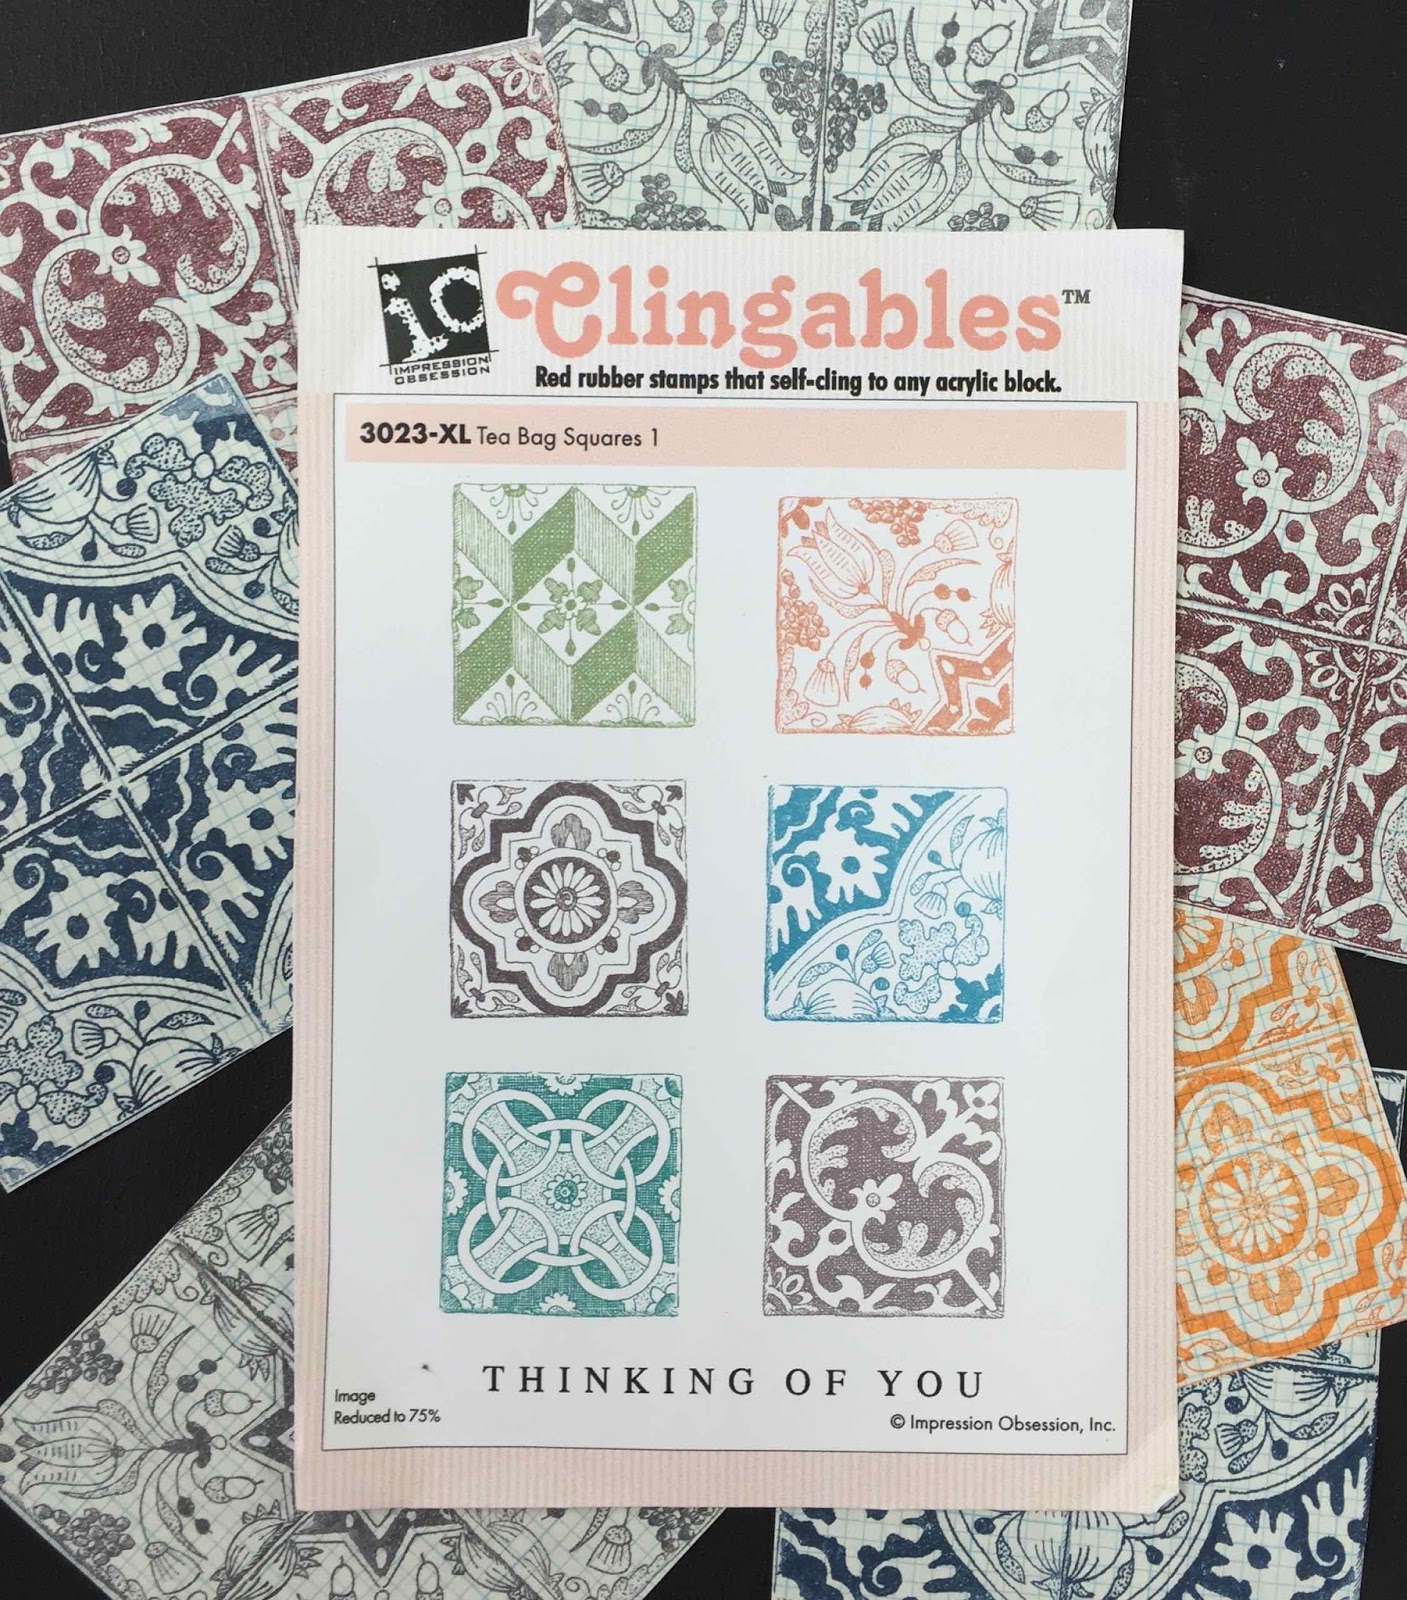
Welcome to the Blog Hop. I am excited to share my discoveries regarding the rubber stamps I received from Impression Obsession. First of all, I requested a group of stamps called Clingables:
This particular group was made for Tea Bag Squares, but I just wanted them because they are such neat patterns. For a brief moment I considered actually making Tea Bag Squares and embellishments, but (although beautiful!!) they seemed too complicated for my feeble brain. 
So I decided to make collage parts which is pretty much my favorite thing to do. I thought it would be fun to stamp each design on graph paper. This would allow me to easily line up the stamps and it would be instantly layered with the grid showing in the background. I used StazOn ink because I knew it would remain permanent and not smear with collage medium.
Here are a few of the images I made:
I love the way these turned out and can't wait to use them in Collage. They look simple yet the complexity is instantly seen once you stamp with them - kind of a vintage tile look which I adore.
And then I happened to notice that a few of the stamps would offer two different design opportunities depending on what part of the stamp takes the center. Take a look at the package above, see the three on the right hand side? Look what happened when I stamped them in a square:
Oh my gosh, was I ever excited about this - six little stamps with such variation, how much fun is that!?!? Here are some parts that I glued onto a journal page:
I also got some of Seth Apter's stamps and I am very smitten with the grid (of course you know how I love my grids. I had to immediately use it in my journal - this time, I swiped StazOn and wet gesso across the page and pressed the stamp right into it resulting in a slight texture. 
I also snuck one of my new reverse Grid stencils into this one, I couldn't help myself, the piece called for it. 
Hope you enjoyed seeing SGP and Impression Obsession together; stencils & stamps living in harmony, it was sure fun. 

                             
GIVEAWAY
StencilGirl Products will be giving away a $25 Gift Certificate to TWO lucky winners!
Impression Obsession will be giving away a $25 Gift Certificate to TWO lucky winners!
Visit the fabulous designers from both teams and comment for your
chance to win 4 great prizes during the hop!
The more blogs you comment on, the more chances you have to WIN!
(One comment per blog please.)
You have until Friday, September 30th at 11:59PM Central Time to leave your comments.
Winners will be announced onStencilGirl's Facebook page on Sunday, October 2nd.


Monday, September 19, 2016

Stencils with Paper Clay

Today I am reviewing Artful Paper Clay, a terrific new book by Rogene Manas. Watch the video to catch the review along with a quick project! 
Hope you enjoy. 


Saturday, July 30, 2016

Stencil Love

Today I am the guest artist on DLP 2016. I made a little video of my pocket cards which you can see here, click the link:

Stencil Love

If you are interested in seeing a quick tutorial, you will find one on StencilGirl Talk, you may watch the "With Two Stencils Tutorial," by clicking here.

Friday, May 13, 2016

Making Mandalas with Stencils

I got a wonderful gift in the mail the other day, a review copy of Kathryn Costa's book, The Mandala Guidebook. Sometimes you just get lucky! Truly. I am not sure the book would have flown onto my radar screen otherwise. I like this book! 
I brought it into the studio the other day, all set to peruse some pages in order to write a review. Now you know StencilGirl Products sells lots of mandala-like stencils, but nothing beats the idea of starting from scratch and creating your own design, so I was excited to learn how to do this.
I became rather engrossed with the book and started reading page by page, as Kathryn covered everything from drawing a mandala freehand to using a grid; painting patterned papers and making collages; even using magazine pages. When I got to page 80, where she was drawing a Grid type mandala on a painted background, it hit me like a ton of bricks - the way the grid structure is formatted looks an awful lot like a Color Wheel! And StencilGirl has Color Wheel stencils, designed by my friend Pam Carriker. 
And, well, since I hate to measure anything, using stencils to trace my format, well it seemed like a bit of simple genius to me. 
I started out by putting a skim coat of acrylic paint on three backgrounds. I decided I would make mandalas using three of my favorite Pam Carriker Color Wheels stencils. I used a pencil to trace the stencil design onto the dry background. 
At first I was thinking I would just use this as my guide and then draw free hand within each space, but heck, I own a stencil company, so you know what I did next.......I grabbed some stencils
                  
I started out by placing a stencil in the center ( Scribble Blooms, the flower in the center). If I were a more precise person, I might have worried about the paint that went outside of the center, however, I am not that person. 

....the photo above shows how I then used painter's tape to tape off a section of the stencil. I thought I would be able to easily fill in the sections this way. I intentionally made the taped off part slightly wider than my pencil lines thinking this would allow the sections to match up to one another (thus compensating for the width of the Mylar during tracing). 
After I stenciled all the sections, I went back with a paint pen and added further embellishment. 
Next up was the Green background and I pulled out some painted collage papers to glue into a few sections, using the stencil (once again) as a tracing guide so the sizes matched up. 
I know I shouldn't play favorites, but this is my fave. I just love how it turned out!!
And finally, the yellow one. Again, I pulled out some collage parts, this time literally scraps from a previous project. 
I've gotta say I was totally inspired by Kathryn's book. It provides specific, hands on, precise information about a variety of ways to make mandalas. I chose to take this in the direction of stencils, but there are lots of other projects I can't wait to explore, such as the Gratitude Mandala and the Labrinth. Anyone with an interest in making their own mandalas will definitely want this book in their library. 

Friday, April 22, 2016

Celebrate Earth Day with StencilGirl + Earth Safe Finishes

Time for another Blog Hop and this time we are teaming up with the lovely people from Earth Safe Finishes.  Seems like the perfect way to celebrate Earth Day, doesn't it?
Nancy Burkhart of Earth Safe, has developed paints and mediums that are free of the toxins and solvents normally present in many of the products we artists use. 
I worry about toxins, especially when I am working with wax products. The need for ventilation is so pertinent I won't work with wax unless the room is properly ventilated.  
So imagine how excited I was when I discovered that Nancy has a product that is a substitute for Cold Wax! And she has pigments that can sub in for the oil sticks I typically use. Zero smell, zero toxins.

Follow along to see how I used these products.

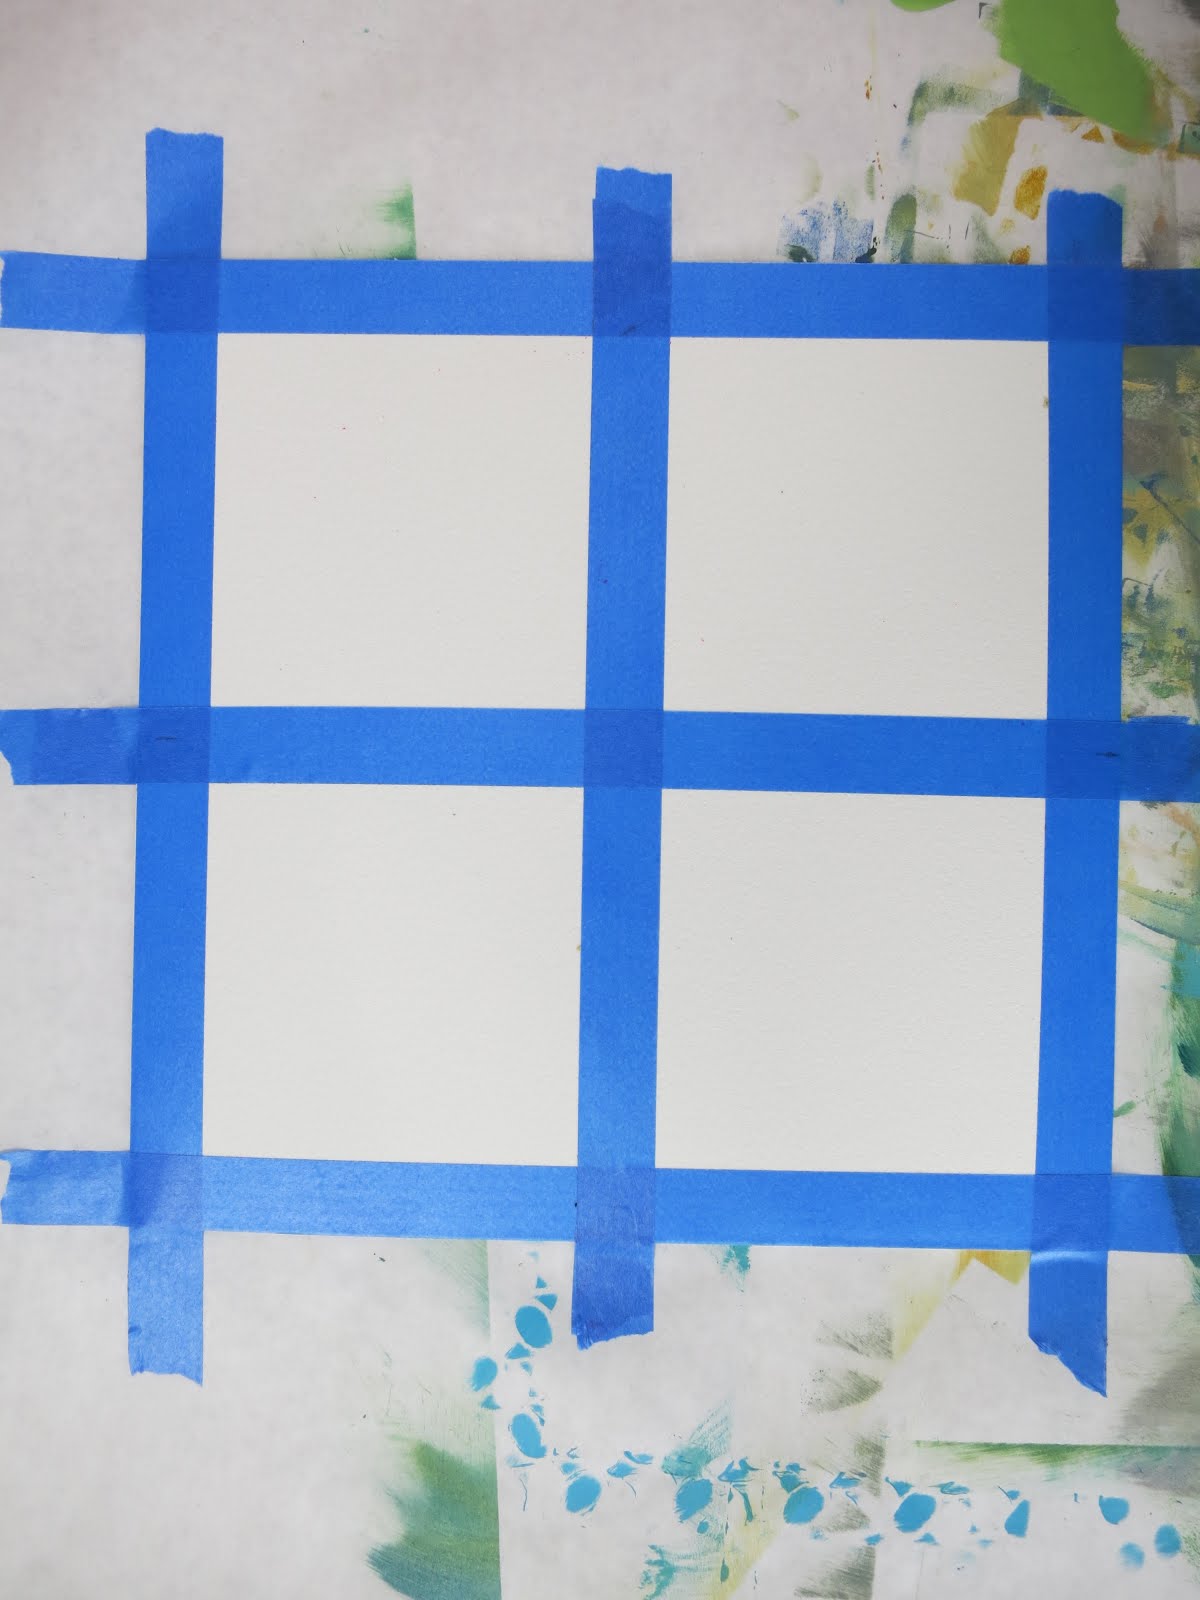
1. I took a sheet of Arches Oil paper and cut it into a 9"x9" square. Using blue painter's tape, I taped off around the edges and taped off a cross shape through the center. That left me with four working square areas, which I treated as one piece.

2. Using Licorice Chalk Paint, I scraped some random marks across my substrate.


3. Truth be told, I couldn't wait to play with the pigments so I immediately opened them and put a few drops (they are intense!) on my palette. The colors are gorgeous and so highly pigmented that you really only need a couple drops, wow oh wow! This is a pretty unusual product - to find pigment in a liquid form, I'm not familiar with another company who makes this. I have certainly used powdered pigments before, but you need to wear a mask because the particles go airborne; these liquids are so darn convenient. You can add them to any of your mediums to create colorful versions of, say molding paste or texture medium or clear tinted gel. Or in my case, Cold Wax!
4. Next I opened up the wax. It wasn't what I was expecting, I thought it would be, well, more obviously waxy I suppose. It is fairly liquid, kind of runny yogurt consistency. And a creamy color. ZERO odor. I kid you not. It was unbelievable, absolutely no smell in these products. I put some wax on my palette and mixed it with the droplets of pigment. 
5. And finally I started to paint. This was all palette knife and skewer work (no brushes) and naturally several stencils jumped in, ha!! 
Since the wax itself is so fluid, I simply used my regular sponge to pounce it through the stencil. The Quinacridone Violet is a simply glorious color. That is it on top of the yellow (full strength) and mixed with some white in the foreground (see below). 


6. Here is my final piece after I peeled the tape away. I just love how it turned out. 
I want to spend some more time playing with these products, they have a lot of interesting potential I want to explore. And here's the thing - these days we are assaulted with toxic ingredients in every part of our life; it is really wonderful for a company to take the time to figure out other ways of manufacturing and to make safe products for artists. Kudos, Nancy!
And guess what? You can win my art. All you have to do is visit the blogs showcased today through Wednesday and leave a comment. The more blogs you comment on, the more chances you have to WIN this one of a kind, 9x9 inch Cold Wax painting on Arches Oil Paper made by me.
One comment per blog please. You will have until Monday, April 25th at 11:59 p.m. Central Time to leave your comments.

The winner of Stencil Girl's give-away will be announced on StencilGirl's Facebook page on Wednesday, April 27th.

Here are the links to the other posts:


Monday, March 28, 2016

Storytelling with Collage

I was delighted (not to mention flattered!) when Roxanne Evan Stout asked me to participate in her book. I had admired her work from afar for many years and the topic of collage is near and dear my heart since collage jumpstarted me into the mixed media world. And, well, you know my pieces always involve a story.

My submission is an encaustic piece, one that is embedded with personal meaning. As sometimes happens, this piece came to me fast, a spilling over of emotion packed into  an 11x14 painting. 
Roxanne's book is exactly as I imagined it would be. 
Thoughtful and Contemplative, full of earthly visual delights, something to savor.......
One of those books where you read every single page. Artists I know like Orly Avineri, Seth Apter, Lorri Scott. But also a lot of new faces who are making wonderfully inspired work.
Everyone has a story. 
Learning to tell it is a gift, doing it with art and collage is the icing on the cake, at least for me. I am honored to be included in this special book. 
And her book (you are going to want it, hint, hint) is available everywhere.