Monday, July 28, 2014

PanPastel Hop

What a thrill to be playing with PanPastels! LOVE these products, I've been using them for years and I simply never tire of their intense pigment. I use the pastels in encaustic work, on my journal pages and here, when trying to 'save' an ugly background.
Now, after me posting a couple of my 'mishaps',  you might be wondering why I have so many ugly backgrounds hanging around?
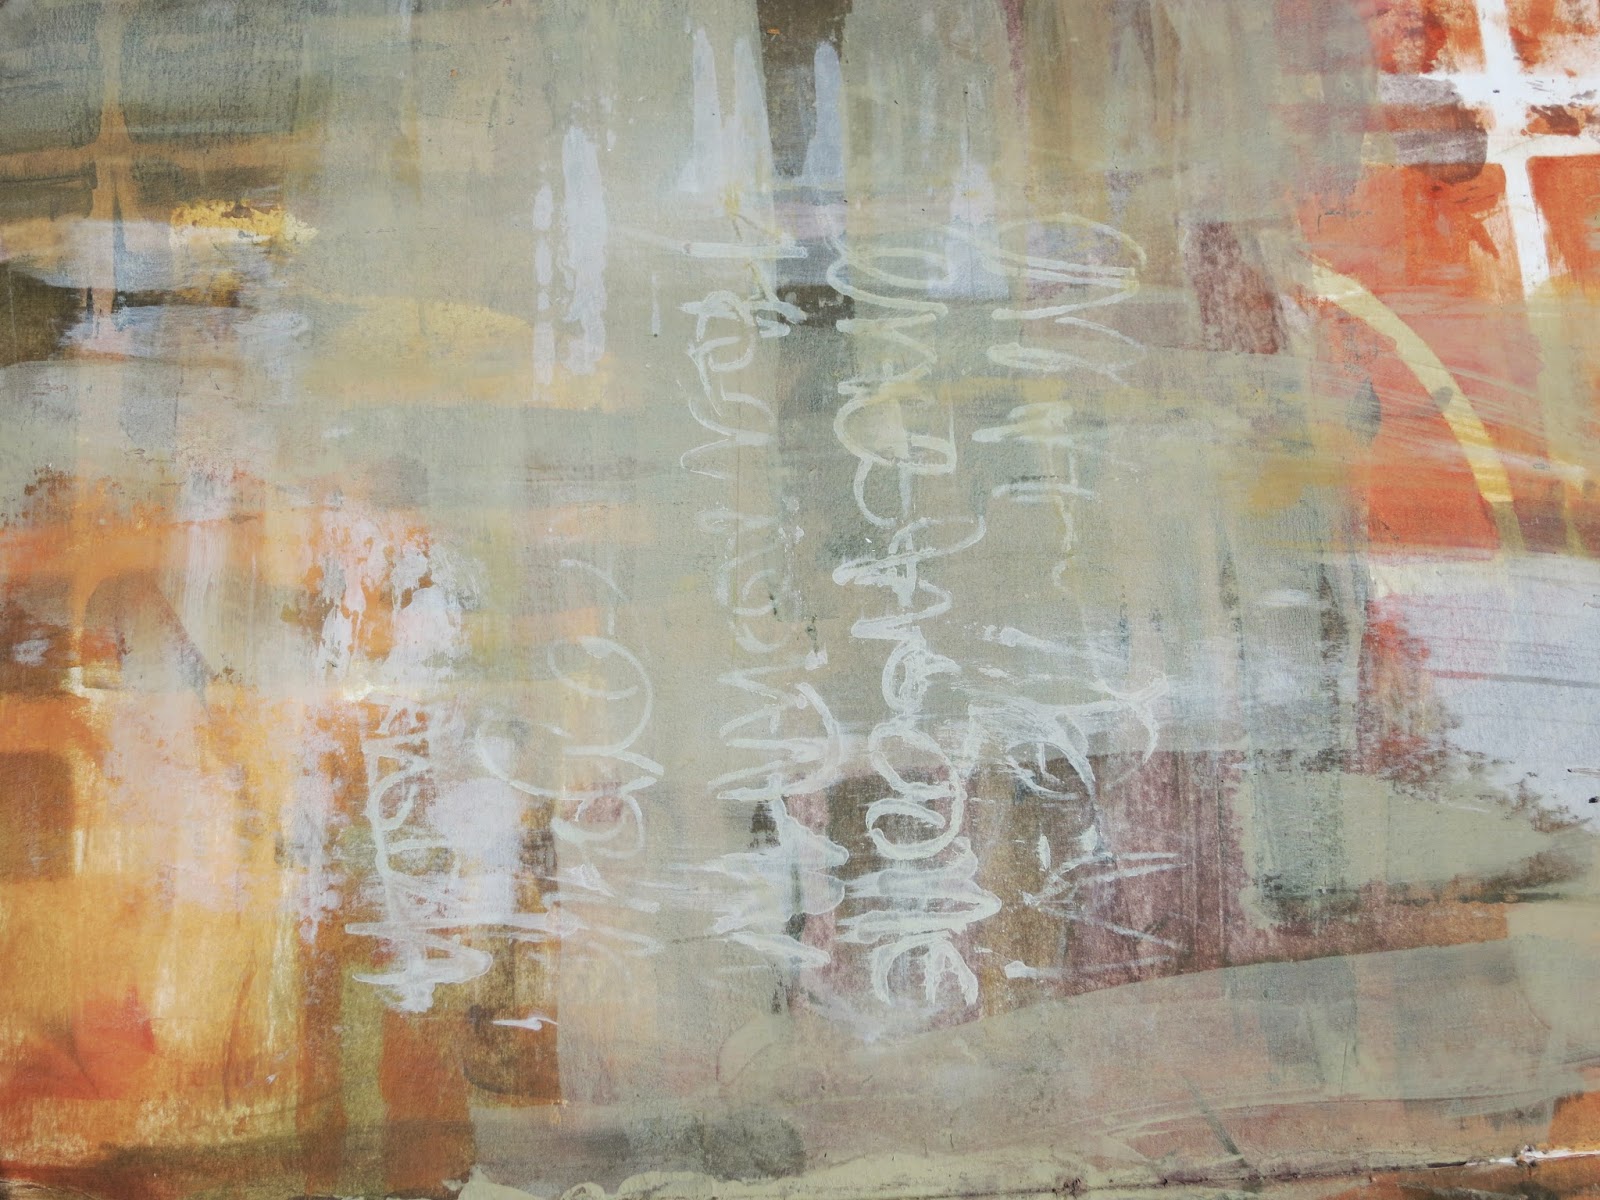
Good question. Sometimes I am convinced that every piece of art must go through an ugly stage. Or maybe that's just me. Plus, I experiment a lot and am often messing around with products in ways they were not intended to be used, mainly because I don't have an art degree so I honestly don't know what you are supposed to do with some products. Ahem.....Needless to say, I sometimes end up with yuck.  Here is a picture of the 'before' with just two stenciled portions.
This was one such piece. I can't even remember what I was doing, but it got super dark on the corners. And it was F-L-A-T.
Ugh.
So I decided to add my texture via Golden's Acrylic Ground for Pastels. Now keep in mind, this Ground is not really a texture product, it is more like a super toothy gesso that is used to prep a surface for working in pastel. Yeah, I even mis-use products that I have been trained to use.
But, I liked the idea of creating stenciled parts to use with the Pan Pastel and the Ground held up well.
I found that, by using the Acrylic Ground for Pastel, I could pretty much 'dry brush' (or 'dry sponge') the pigment over the Ground and somewhat retain my background color. Of course I got going a little more wild and wooly and ended up creating several layers of Ground. All the color shown here (except for the little bits behind the bird heads and daisy) were achieved with PanPastel.
Can you say YUM!
Here are my tips for working with PanPastels:
  1. Use the Sofft Tools, the texture of these amazing sponges is simply perfect.
  2. Keep a clean paper towel at your side while you work. Before you change color, wipe the sponge on the paper towel until you no longer see any pigment color coming off. This will ensure that you don't contaminate the next color you use.
  3. Use less color than you think you need. One swipe provides more pigment than you can ever imagine. 
  4. Don't be afraid to experiment. I have created many cool effect with PanPastel and blending them out with gesso or other mediums. Remember, they are pigment!!
  5. Check out the PanPastel website, specifically THIS PAGE, which I have found to be extremely helpful.  
GIVEAWAY
We know after you see all the techniques we show you this week you are going to want to play too! Enter the GIVEAWAY to be eligible to win the prize below. Just leave a comment and tell us if you use PanPastels with stencils and your favorite technique. You can also leave comments on all of the individual posts this week on all the blogs from our team members for another chance to win! All comments within the 4 day period are eligible.

GIVEAWAY closes Sunday, August 3rd @ 11:59PM Central Time.
One comment per post please.

PRIZE
Monday

Monday, July 14, 2014

Introducing NEW StencilGirl Artist Traci Bautista Blog Hop

I am excited to welcome my friend, Traci Bautista to StencilGirl Products, woo hoo!!! Her stencils are so her. So Traci, you could pick them up anywhere and know who designed them, she has such a strong artistic voice. I love that about her.
I've mainly been playing in my journal with the stencil masks - because that is what many of them are, masks. It is a subtle distinction in the stencil world. For me, I think of masks as the thing you reach for to cure all your mistakes, ha! I mean look at this page:
I had a bunch of color, no direction, this page was going nowhere fast. All I did was use the mask overtop the entire spread and sponged with gesso. Instant cute. I think it would be pretty cool to go back and do some doodles in those open spots. Or even journal words, patterned collage components, stencil over top or ? What would you do?
Here is another snippet, this time a painted paper towel, this is actually part of my upcoming webinar:
It is amazing to me how changing color and using only a portion of the stencil turned this into an interesting abstract - I took Traci's imagery and made it my own. Now *that* is good versatility in design.
Here is a collage of some of my pages, you can see some DLP here too, I am on week 2.....there is also a sneak peak at a project I did for The Mixed Media Workshop TV. 
Hope you enjoyed a peak into how I have been playing with Traci's stencils. 
Ready to HOP??
Before you do, make sure you enter the GIVEAWAY!!!!
We will pick TWO lucky winners!
Each one will get a complete set of Traci's 5 new designs!
What do you have to do?
Leave a comment here and the other blogs on the hop. 
The more comments blogs you comment on, the more chances you have to WIN!
(one comment per blog please)
Comments close Sunday, July 27th at 11:59PM Central Time.

GIVEAWAY will be open a full 2 weeks! 
WHY???
Mary Beth has a webinar on July 24th and her guest????? 
You guessed it!

Not signed up yet?
Get all the info HERE!

Monday, June 23, 2014

StencilGirl Blog Hop Featuring NEW Artist Orly Avineri

Do you believe that stencils can heal?
I don't know if I actually believe that either, I mean they are just Mylar after all. I do know that the day I used Orly's new stencils, I was working through some issues and it seemed like they had a magical effect on me because I gained instant clarity into my situation. It must have been the stencils, right?
I'll be frank. Orly's stencils probably aren't for everyone. They are intense. They are raw. They are beautiful. The symbolism is rich. These are stencils that make me think and I absolutely adore them.
Here are some of the ways I've been using them.
First of all - to make backgrounds. Those intricate bits are so gorgeous, I can see using them literally all the time.


 Deli Paper anyone? I had some extra paint on my palette and made a collage bit.
And here is the spread that I did. I used several of the stencils and love the way they work together as well as separately. The drips are pretty darn fab if I do say so myself. You know with 'real' dripping you lose control.  (I mean duh, rigth?). This is different because you can place it exactly where you want. Does that make me a control freak, wanting to 'place' my drips? 

Take a visit to everyone in the Hop and be sure to enter comments for our contest. And if you don't win a set of the stencils, just hurry over to StencilGirl and get them for yourself. I think you will be pleased. You can see all of Orly's new stencils HERE.


Monday, June 02, 2014

StencilGirl, Linda Robertson and Enkaustikos Blog HOp

Last year I was fortunate to attend encaustiCON in Santa Fe, a meeting of the International Encaustic Association. I had been invited to present a demo/class on 'Addressing the Substrate' and felt truly honored to be among some of my encaustic heroes like Linda Robertson. She was so authentic and down to earth, I instantly liked her and felt a connection. Naturally I gave her stencils because I knew she liked them and wanted her to use ours.
Enkaustikos Linda Robertson set
Flash forward.  Linda was working with Kathryn Bevier from Enkaustikos to create a kit of materials and wanted to include a stencil, ultimately she picked Pippin's Dragon Flower.  
Imagine my delight when they went this awesome kit for me to try! Wowzers!! In addition to all the items shown in the picture above, this Set includes video downloads from Linda. And I am here to tell you they are awesome. She is a terrific teacher and her Set is well worth the money. 
Here are some shots of the project I made. 


I started out with the fantastic cradled substrate that was furnished (nice!!) and randomly use the Enkaustikos paint and medium to build up a background. These paints are SO loaded with pigment, they really go a long way and I enjoy the Snaps format, you can snap off a bit at a time so nothing is wasted. 
Being the abstract person that I am, I decided to use Squared On, a stencil of my own design that is a real 'go to' for me. I placed the stencil on top of my piece and painted the encaustic paint over top the piece, moving the stencil several times and fusing in between each layer.


Next up was the Pan Pastel. Oh my is this blue ever a gorgeous color! Once again, I place my stencil and used the Sofft sponge to apply the Pan Pastel right on top of the wax. It simply 'grabs' the wax in and a quick fuse is all you need to add this delicious pigment. LOVE using Pan Pastels with wax.


 I then played with the other tools furnished in the kit, namely the pointy tool and the scraping tool. These both allow you to pull back some wax and create interesting texture effects.


 Here is a close up of some of the texture I obtained.


And finally, here is the completed painting.

In my opinion, this kit is a wonderful value. It includes everything you need to obtain fantastic mixed media results with your encaustic work. The paints and tools are super high quality - no corner cutting here!! And you are going to love Linda's instruction. A class and supplies, what more could you want?
Before you leave, make sure you comment to win the prize from StencilGirl Products and Enkaustikos!


Giveaway includes:
(4) 9" x 12" Stencils from StencilGirl Products Retail Value $56
(3) Online Lessons from Linda Robertson (RobertsonWorkshops.com) Valued at $45
(1) Collection of Wax Snaps and Hot Sticks from Enkaustikos Valued at $75
All to ONE lucky winner!!
Giveaway will close on June 8th at 11:59PM Central Time. Every comment in the hop is eligible for the giveaway. The more blogs you comment on, the more changes you have to win. One comment per blog please.

Blog Hop Order

Tuesday, May 27, 2014

Art Journal Love

OK, OK, you already know I have become obsessed with Art Journaling, in fact, you might be tired of me talking about it, I hope not though. 'cause I can't help but share. Journaling has seriously changed my life and provided me with an easy artistic outlet during this time when I haven't been able to be in the studio as much as I would like. I would normally be grumbling something fierce, but my journals (yeah, I am working across several these days) have saved me. 

Today my pages take advantage of new stencils by Terri Stegmiller. They are pretty darn awesome (the stencils, I mean). And you know what? I have never met Terri in person! She has been with StencilGirl for a long time, contacting us quite early in our journey. I am so glad I brought her into our li'l family as I love her aesthetic. You can find her new designs (and other new ones too! ) on the 'What's New Page of our website. 
But back to journals - they allow me to try products that I might not use in my paintings. Like GELATOS!!! Made by Faber Castell, I have known of them for a long time, but since they are water soluble I never bought any because I work so darn wet in wet when I am painting. I figured they would be wasted.
Guess what? They are absolutely PERFECT for journals! Oh.My.Gosh. I bought this little pack on a whim, when I was at Dick Blick last week, Assorted Reds (includes pink and purple though, yay!!!) and I also got a Double Scoop Mango. I am smitten in love with these Gelatos.
Fabulous results, they are so creamy and gorgeous, I can easily layer up color on my painted pages. They are just so-so yummy.
I also used irResistable Texture Spray. I heard about this from my friend Seth Apter and of course I had to get my hands on some too. If you enlarge the 1st and 2nd picture you can see where I sprayed some in the corners - it dries super fast and leaves a splattered texture which is very cool. I used it on some of my labels too (3rd photo).
Needless to say, I had a wonderful weekend. I pulled back from StencilGirl duties for a few days so that I could have a chance to relax and refresh with my family. I journaled to my hearts content, even journaled with my friend Mary Nasser on Saturday. FunFunFun and the Journaling is good.
I feel restored.
How about you? 

Monday, May 19, 2014

Hip hip for Pippin

My friend, Pippin Schupbach, has some new stencils out from StencilGirl Products and they are so appropriate for the season, it finally being biking weather here in the Lou.


There are cute stencils and I did a journal page with them just to play around.


See the right hand page, the interesting pattern at the top? That is the tiny bike border, I couldn't get over what a cool pattern it made! And you don't even realize it is bikes until you look closely.
Very fun - I think I want to make a t-shirt next, with the cruiser bike on it. 
In other news, are you signed up for my Webinar? HERE is the link. Even if you can't attend on Thursday, you get the recordings and step by step instructions that are yours to keep. It is a pretty good deal really, I packed a lot of info into it.
So......see you there!!

Wednesday, May 14, 2014

Of Surgeries and Art and Healing

What on earth have I been doing you might ask, seems like I am in and out and around and up and down and before I blink another month has ripped by me.
Part of a journal page
You remember my Mom had surgery and I traveled to be with her during and afterwards, she was a real trooper, I would love to be able to to show you some of the photos I took but she is so very private she would freak out. In fact, don't tell her I am even sharing stories, ok? Pictures like the one with the little ET-like contraption on her finger; she would point her crooked finger with its red glow, in a way that might be adorable except it was the wrong finger if you know what I mean. Or the photo of her walking hospital halls, all the 'devices' removed for the first time so she had put on a really cute nightgown I had bought her, she was wearing it with her stylish Birkinstocks don't you know, quite the fashion statement. Or maybe I could tell you about the absolutely hilarious post surgery bits my brothers and I soverymuch wanted to film, our doped up Mom flirting with doctors and cracking jokes left and right. She doesn't remember a thing.
Painted envelopes that I used to send Happy Mail
I guess what I am saying is it wasn't all bad. Sure it sucked, it was a damn serious surgery and she has the cruddy C-word, a rare kind that has been removed so we are told, but how does anyone know for sure, this sneaky disease that is known to jump from organ to organ. So we continue as the joking type people we are, when the going gets tough, we tend to crack often inappropriate jokes. Like weeks before surgery when I called my Mom on the phone and said, "Hey Mom, how's it going, you still got Cancer?" Lucky for me, she shares my extremely twisted sense of humor. And I believe these moments help us at least get some emotion (perhaps not the 'right' one?) out. I don't know but it somehow works for us. That plus my Art Journal. Art does save you know, I had my Mom painting collage pages just days after surgery. And I took doodle stuff for all my family. Of course they laugh at me, they are beyond the idea of indulging my every whim. But you knew that.
Another journal page, that is a tree picture I took
In art news, I did manage to film my latest Webinar during all this hullabaloo. HERE is a link to sign up if you so desire. I am proud of it, I did the filming and editing myself and am pleased to say that *I* would even sign up, I do think it is worthwhile. 

Monday, April 28, 2014

NEW Stencil Release Blog Hop Featuring Seth Apter

Seth Apter packs so much into a stencil; I mean seriously, look at these stencils! There are so many li'l sections of goodness. These are the kind of stencils you will find yourself reaching for over and over.
I especially love the words he chooses as they have double and triple meanings and can be applied to so many situations. In my opinion they are must have stencils for journaling or, well, for just about anything.
I decided to work in my journal again - you've gotta know I am absolutely addicted to art journaling now! Here is the spread that I started with, a randomly painted and stenciled page.
First I selected some collage bits, things I thought I might possibly use. I tend to pull out a lot of stuff and then only use a small portion of it, but that's ok.
This page is highly personal for me, most of my pages are if I think about it. But this is the one I did the day my Mom got her diagnosis. The Big C diagnosis. By the time you read this, I will already be in Cincinnati for her surgery and aftermath - what will hopefully turn into a good recovery. My Mom is super private, so I don't want to share detail here, but your prayers or positive thoughts would be so appreciated.
Here are some closeup pages:
This part below includes a really weird selfie I took back before they were called selfies.
It looks like I am having an out of body experience, which is pretty much how I feel.
And finally, here is the finished Journal Spread.
I used all three of the stencils in this spread, little bits here and there. I also used them again the next day and the next day. Ahem. LOVE them!! Way to go, Seth!!!
GIVEAWAY
Before you go, make sure that you enter the GIVEAWAY! Just leave a comment below to be entered to WIN Seth's new releases! 
You will have until Sunday, May 28th at 11:59PM Central Time to leave your comment.

Monday, March 31, 2014

StencilGirl Blog Hop Featuring NEW Artist Andrea Matus deMeng

What a thrilling day for StencilGirl Products!
I have wanted Andrea to come on board for us for, well....for a long time. Every time we would see each other (at a teaching gig), she and I would talk again but fail to develop a plan. This has been going on for a stupid (slaps self in head) amount of time. But the thing is, Andrea is a mom, an artist, a teacher, a wife, I could go on and on.......not to mention my schedule.....we are both super busy girls and life just kinda snuck up on us.
So I am absolutely beyond delighted to introduce Andrea Matus deMeng as the newest StencilGirl artist.
Her stencils completely R-O-C-K, as I knew they would. I imagined she would design stencils with an edge - sort of tattoo meets sophisticated beauty. Somehow she knew exactly what I wanted even though I didn't verbalize it well. I can't wait to work with all her stencils, but for this Hop, I chose the Fowl Play stencil and the Free as a Bird stencil.
I am gaga for these birds. I love that they come in 2 sizes with slightly different looks and faces.
I should have taken a picture of the stencils before I got them dirty, eh? Hmmm, so what's new?
Working once again in my journal, I used a Sofft sponge to dab Pan Pastel over the stencil. My background pages were pretty busy from the start and the blue I chose didn't 'pop' as much as I had hoped so I decided to try something different.
Being as it was late at night and I was too lazy to get the paint out, I scraped a little 'pan pastel powder' onto my palette and then added gesso (plus a drop of water) to it. Using this 'paint' and a couple of Pitt Pens, I was able to paint this bird. We are talking 3 seconds max.
And it doesn't even look like I used a stencil so much, does it?
Wowzers!
Now I am *really* gaga for these birds.

Enjoy the Hop! I can't wait to see what everyone has done.


Follow my blog with Bloglovin

Monday, March 24, 2014

StencilGirl and Lost Coast Design Blog Hop

First 'truth be known' in this post.....I am not a big rubber stamp user. Back in the day, that is pretty much all I did and then I moved away from stamps. But I met Linda (owner of Lost Coast Designs) on the retreat circuit several years ago. She has some super cool stamps, the type that draw me in - ones you can use in the background of artwork and they will blend right in with the rest of the mixed media. Stamps that don't look so much like....well......stamps.


These are the two stamps that I picked; here comes the 2nd 'truth be known'.....I had this plan to make a real piece of art, using these stamps along with a Thermofax from one of my photographs. Homage to beach grass or some such thing. I was really excited about it, you know how that goes, right?
Ahem.
Life intervened, the deadline for this Blog Hop looming, my column for Somerset due, teaching gig on the horizon.....I ended up simply working in my journal.
And here comes the 3rd 'truth be known' statement.....that is about all the art I make these days. Journal pages.
But I digress.
Here is one half of the spread. It probably isn't finished, I tend to go back and back and back to these spreads. The grasses are a very nice edition to the page though and I even like that goofy eggplant color, which basically represents one of just a few stamp pads that I own (plus the Gold I also used).
I had to put grass on the other side too, I have a compulsion for symmetry, don't cha know!?!
This was good ole simple stamping - stamp plus inkpad, then a tad of blotting with my baby wipe. Easy peasy, nice quick result. You gotta love stamps, huh?
Hope you enjoy our Hop today.

Thursday, March 20, 2014

Webinar - Supply Links

Stencils I Used:
http://www.stencilgirlproducts.com/Crosswords-Stencil-p/l206.htm
http://www.stencilgirlproducts.com/product-p/m014.htm
http://www.stencilgirlproducts.com/product-p/l046.htm

Supplies that I used in Demos and/or discussed


Pan Pastel Starter Sets painting Colorfin Art Sponges mixed bar pack of 4 Magic Rub Eraser block each Fine Art Fixatif 11 oz. can Identipen Marker black Microperm Fine-Line Pen Set set of 3 Brush Tip Permanent Marker Sets assorted set of 12 Gelly Roll Glaze Pens black pack of 2
XL Mix Media Pads 9 in. x 12 in. pad of 60 sheets wire boundInk Applicators Ink Sweeper each

Pitt Big Brush Artist Pens dark chrome yellow 109

Pitt Big Brush Artist Pens orange glaze 113
Catalyst Silicone Tools mini blades no. 2 white
Catalyst Silicone Tools wedge No. 6 white

(please note I will continue to update this list with links of where you can buy some additional products that are not listed)